
Week 3 of our little denim experiment appears to be upon us. Stunning how quickly time is buzzing by us. Luckily, my friend is here to help us appreciate what time we have left. Her name is Gwen and, well, I think I'll let her handle things from here...

Isn't it cute? It's really simple, too. Let me start with a little story about how this came about. A couple of years ago I bought an adorable burlap clothespin bag. It hung on a hook on a tree by our clothesline, and it looked fantastic. Over time, the evil squirrels that are slowly taking over our yard destroyed this cute little clothespin bag. And all that was left was this...
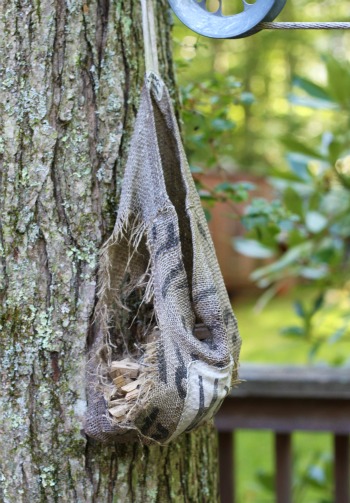
It was in sad shape. I'm not even sure how the clothespins were still staying in the bag.

I decided it was high time I made a new clothespin holder, and I'm hoping the denim will hold up to the squirrels better than the burlap did.
OK, enough about my clothespin bag troubles. Want to make one? Here's the how-to...
Materials:
- 1 old pair of jeans
- a few scraps of fabric
- paper-backed fusible web (I used Wonder Under.)
- seam ripper
- ruler
- scissors
- thread
- pen
- iron
Step 1: You are going to use a pant leg from your jeans to create your bag. Lay out your pair of jeans and cut one pant leg 10.5" from the hem.

Take this piece and measure the width of the leg across the end where you just cut. Write this down... you'll need it in a few minutes.

Going back to your pair of jeans, with your jeans laying front side down, cut right up the seam of the pant leg to get to the widest area of the leg. Cut across under the pocket to open up the fabric.

Step 2: Now you will need your pant leg width measurement from Step 1. You need to determine what size circle to cut for the bottom of your bag. This can be done using the equation for circumference, C=(Pi)d, where we are looking for the diameter, d. If you are afraid of math... don't freak out! I'm a former math teacher; I'll walk you through it. You want to know what diameter to use, so take your measurement, multiple it by 2, and divide that by 3.14. That will give you the correct diameter for cutting your circle. For example, my width measurement was 9.25". I multiplied that by 2 to get 18.5". I then divided that by 3.14 to get 5.89". I rounded that up to 6".
Next, I took the very scientific approach of measuring every bowl I own to find one that is 6" in diameter. I traced that onto my opened up pant leg, then cut out my circle.


Step 3: Cut out one of the pockets on the back side of the jeans. Cut as close to the edges of the pocket as possible.

Cut off the back of the pocket. Cut as close to the seam as possible.

Step 4: Time to decorate the pocket. The possibilities are endless, but here's what I did... I took four scraps of fabric and some paper-backed fusible web. I ironed the fusible web onto the back of my scraps, following the manufacturer's directions. I then cut hexagons from each of the scraps (I used my AccuQuilt GO! Baby fabric cutter, but you can use any type of die cutter or trace a template onto the fabric and cut the shapes by hand). I removed the paper from the back of my hexagons, arranged them on the pocket, and ironed them in place. Finally, I sewed around each hexagon, about 1/8" inside the edges. Cute, huh?

Step 5: Lay out your pant leg piece from Step 1 with the original hem of the jeans at the top (You'll be tempted to turn it around so the hem is at the bottom... don't). Position your pocket in the center on one side of the pant leg and pin in place.

Sew around the edges of the pocket, leaving the top open.

I use the front pocket to hold my clothesline spreaders (those things that keep the top and bottom of the clothesline from spreading too far apart when the clothes are hanging on the line). Hopefully it will not become a storage unit for a squirrel's winter supply of nuts and acorns.
Step 6: Turn your pant leg inside out. Take your circle from Step 2 and mark every quarter with a pin. To do this, fold the circle in half vertically and place pins at each fold. Open the circle and fold in half horizontally. Place pins at each fold. Do the same around the raw edges of your pant leg... place a pin at each seam and pins on both sides halfway between the seams.

Match up the pins on your circle with the pins on your pant leg. Pin the two with right sides together at the four places where your pins meet up at each quarter.

Add additional pins all around the edges, and sew around the edge using a 3/8" seam allowance.

Your basic bucket shape is complete! This is what you should have at this point...


Step 7: Now you need some way to hang your clothespin bag. Using a seam ripper, remove two belt loops from your jeans.

Loop one of the belt loops around and pin it to the inside of the back of the bag in the center, right at the top.

Loop the other belt loop around and pin it to the inside of the front of the bag in the center, right at the top. I added this loop to keep the bag closed when I'm not using it (and to discourage unwanted visitors from sleeping in it :). When I want clothespins, I just need to remove the front loop from the hook in order to get into the bag.
Sew back and forth over both belt loops to secure. And guess what? You're done!

I hope you'll come visit soon over at Gwenny Penny. I would love to have you stop by. Thanks so much for having me here today, Michele! Wish me luck with the squirrels :)


Um, don't tell Gwen I said this but, honestly if I were a squirrel, I'd move all my nuts lickety-split to that clothespin bag, settle in with the wife and kids, and never leave. That is one sweet bucket of a clothespin bag! I'm impressed at Gwen's use of all the different jean parts, and how she works that π (3.14) like there's no tomorrow. She is one smart cookie, eh?
Thanks so much for playing along Gwen. It was an honour having you and I hope we'll work together again very soon!
Okay. For today I'm Diggin' This Denim: Denim Chair by Scrap Lab
You have yourself a fabulous Monday now. Chris from Pickup Some Creativity will be having a go at the denim on Wednesday. And me? Well I'll see you then!
lovely!!! voy a hacerme uno hoy mismo. Te lo enseñaré en cuanto lo tenga terminado.
ReplyDeleteSaludos.
Núria.
Way cute Gwen!
ReplyDeleteNice and easy to make. Great!
ReplyDeleteWhat a transformation both for the denim and for the clothes peg bag. Hugs Mrs A.
ReplyDeleteThat is a most excellent clothespin bag!!! Thanks Gwen!
ReplyDeleteAdorably done. May the squirrels leave it along! :)
ReplyDeleteVery nice. Love how it has a very specific function to replace something useful but beyond repair.
ReplyDeleteAnd Michele, the chair you linked to at the end is fantastic!
Gwen - I thought the photos of your "before" clothespin bag were hysterical! If there is something called "jean heaven" this is what I want to be - a clothespin bag. Super useful project. Great job.
ReplyDeleteGwen, this is so cute. I always use clothespin bag and this one certainly the cutest!
ReplyDeleteCute idea! Looks very roomy too!
ReplyDeletewonderful idea! Love the execution!
ReplyDeletexoxo,
Amy
Thanks again for having me, Michele. No unwanted tenants in the bag as of yet :)
ReplyDeleteA much more durable clothespin holder, and I like the way it's decorated!
ReplyDeleteHow convenient! I just purchased new jeans because I wore out my favorite pair AND my bachelor brother needs a cloths pin bag that is functional and durable. This is a prefect one for him!!
ReplyDelete