Showing posts with label toys. Show all posts

Thursday, April 4, 2013

You Guest It: A Happy Stitch


Every 1st and 3rd Thursday of each month I'm doing something new. It's a thing I'm calling "You Guest It" and it's where I let a guest do their crafty thing right here on Michele Made Me. Today I'm welcoming A Happy Stitch's Melissa Q! Oh look, she's starting...

***

Hello Michele Made Me friends! I'm so excited to be one of Michele's guests. I love Michele's blog... Her projects and her perspective are so inspiring and honest. I am just thrilled to be here.

I'm sharing how to make what I call the Super Scrappy Scarf but 'scarf' really doesn't scratch the surface of what this scrappy chain of knit fabrics can be. Intended to spark the imagination, the Super Scrappy Scarf is a great open-ended play-thing for little people and in our home it has been everything from pretend hair, a tail, 'water', a finish line and on and on... It's super!

So, let's get cracking on how to make it!

Sunday, July 22, 2012

Tower Crane Building with The Boy


The Boy found the children's book Make It Work! Building by Andrew Haslam at our local public library last week. When we got home, he sat drooling over all the projects and loudly pointing out his favourites. After some cajoling and batting of the eyes (his - not mine), he managed to convince me that model building was probably something WE should do together. So, we rather painstakingly, narrowed down his choices to one.


Over the ensuing week, we set to building the model tower crane depicted in the book.

It was not a quick project. We spent a few hours per day over several days gathering and purchasing all the necessary bits and bobs, rummaging through my stash for things we could use, measuring and cutting all the component pieces, sanding, joining, and of course, waiting for glue to dry. A few times The Boy's interest was tested but, with a little cajoling of my own, we got it done.

In a few instances, we strayed from the plans. For example, instead of creating joints using the suggested hot glue gun (which I happily avoid anyways), we created them using carpenter's glue and little triangles of newsprint. And instead of making the boom in two large pieces and then glueing these two pieces together as shown in the book, we made one large boom all at once. We did the same for the tower.


I was also happy to find a use for a few odds and ends from my recyclable stash too. You know those little plastic hooks that come with store-bought socks? I've saved a veritable heap of them! It was nice to finally use a couple of them in this project. Also, the side of a small mandarin orange crate came in handy; we used one to make the two wooden platforms on the vertical tower.


In truth, our tower crane is not quite done. There are still a couple minor kinks to work out. We'd like to tweak the chain winding mechanism; it could run a little more smoothly we think. And the horizontal boom could use a small platform to rest on for additional stability. But otherwise it's pretty darn nifty.


I'm now thinking I'd like to build myself a model of a bridge... No, not for The Boy! For ME!! Doesn't that sound like heaps of fun?

♥M

Thursday, April 26, 2012

Series 9: Old Towel New - Bath Puppet


Ah yes... Here we are. 'Tis the final chapter in the Old Towel New saga. With only scraps and dregs left over from the other towel projects I barely managed to scrape together this sweet double-duty bath puppet. See? It can serve as both a toy and a soft washcloth. The little ones can simultaneously have fun AND get sparkly clean. Handy, no?


Here's the how-to:

I made a simple newspaper template as below and cut out 2 of the large pieces and 4 of the circles.


I sewed two pairs of circles together, leaving a gap for turning. I then zigzagged around all edges of the two large pieces. I snipped the edges of the two circles (ears) and turned them inside out.


I cut a piece of freezer paper big enough to accommodate a face for my puppet and ironed it to one of the large pieces. I drew the face. [Note: I used freezer paper because it's difficult to transfer a design onto towel with all those nubblees hanging about.] Now, using a running stitch and embroidery needle and thread, I outlined my design directly through the freezer paper. I then carefully, very very carefully, removed the freezer paper. Finally, I went over the entire outline with a back stitch. Oh yes, and I used satin stitch for the tiny myopic eyes.


To put the puppet together, I placed the circles (ears) onto the face as shown below, and then put the other large piece on top and pinned the layers together. I machine-stitched around the perimeter just inside the zigzagged edge, leaving the bottom open. I stitched one last zigzag around that bottom edge to finish it off neatly. Finally, I flipped the whole thing inside out and...


Behold! One fine play 'n wash bath puppet:


That Terry... He's hilarious.

♥M

The rest of the Old Towel New series: mop pad, washcloths, soft watchband, car sponge, oven mitt.

Tuesday, November 22, 2011

The Boy Says


♥ "Mommy, I forgot to eat my three Halloween treats today. But that's okay, I'll have six tomorrow." 

Is that the deal?

♥ "Mommy, on the first day of December you have to remember to hang up that number thing with a treat for every day until Christmas. If you want, you can borrow my Halloween candies to fill it up, okay?" 

That's actually a good idea.


♥ "Mommy, maybe by the time I'm 18 years old, paleontologists will have discovered why Argentinosaurus had a so small head." 

One can only hope.

♥ [In reference to one of my egg carton people] "Mommy, that one looks like an ant-eater." [Followed by peels of laughter.] 

Does it? Really?

♥ [In reference to the great family movie: "Akeelah and the Bee"] 
The Boy:  "Mommy, they used the F-word in that movie." 
Me:  "No they didn't!" 
The Boy:  "Yes, they did. They said freak."

Oh. Right... I guess they did use the F-word...


Friday, October 21, 2011

Halloween Juggling Eyeballs


This is a Halloween craft but it's also a love craft. See, when Lo and I first met way back when, we both worked at Science North, a children's science museum in Sudbury, Ontario. Learning to juggle, and teaching others how, was part of the job description. It was our way of breaking the ice with the visitors and getting them involved in the whole museum experience. On top of that, we taught people how to make these balloon and rice juggling balls so they could go home, throw some together, and keep honing their juggling skills.

Science North is where Lo and I first made eyes at each other. And it's pretty much guaranteed that we fell in love whilst learning to juggle (and flirting our pants off) over a shared trio of balloon and rice juggling balls. So today's craft is dedicated to Lo and his blue-green eyes: the sweetest pair of eyes I ever did see.

Balloon and rice juggling balls have been around for eons. HERE is a fine tutorial by the Ontario Science Center's SciZone already done up and ready to go. It shows how to make the basic juggling balls. Today I'm adding my very own Halloween twist on this tried and true craft.

Tutorial  ✂  Halloween Juggling Eyeballs

Start by making the basic juggling balls as per the OSC tutorial.

Note that the juggling balls are made of 3 layers of balloons with rice as the filler. The colour of the first layer doesn't matter; it'll be completely covered. However to produce the eye effect, I used black and white balloons as my second and third layers respectively. 

Starting to look like eyeballs, eh? You could leave them just like this, but I chose to add a little flavour to them by painting in some irises and drawing on some tiny red veins.


And there you have them! Sweet and juicy juggling eyeballs. Does it feel like you're being watched?... Spooky...


Here's Lo now testing them out. They work like a charm! See that? He's still got it after all this time.


Make a few as Halloween decorations or have a go at juggling yourself! It's surprisingly relaxing once you figure it out. It only took me 24 days to learn!

Have yourself a fantastic weekend. Eye'll be back here on Tuesday!


Friday, October 7, 2011

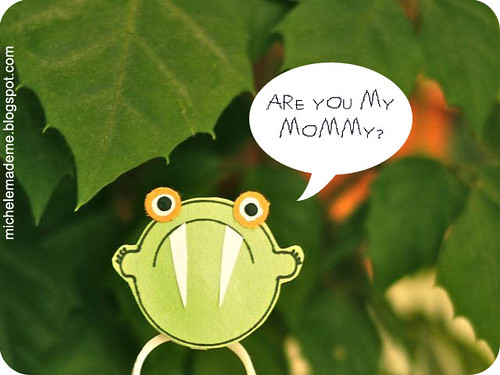
Kid Craft: Monster Baby Finger-Puppets


Monster Baby Finger Puppet

Um... despite the uncanny resemblance, I am not your mommy...

Oh hi there, happy Friday!

With Halloween on the way, I thought today's super-quick craft was fitting. It was inspired by the teensy monster babies in Microcrafts, the book I reviewed in Wednesday's post. The original monster babies in the photo below are made of embroidered felt.

Monster Babies from Microcrafts designed by Holly Keller

Using Holly Keller's monster baby concept, I cobbled together a little finger-puppet from teeny bits of construction paper and a plastic milk carton seal.

My little one is unusually terrified of any and all odd-looking characters. I thought that maybe these tiny and extremely benign monster finger-puppets might be a good way to re-introduce him to monsters, and ever so gently work away at that fear.


As you can see, this craft is the definition of simple. Make a monster baby the size of the plastic milk carton seal from a few scraps of construction paper. Flip the plastic seal inside out. Glue the little guy onto the seal. You now have a diminutive monster finger-puppet!


Alternatively, if you leave the seal in its original position, you have yourself a monster baby ring.

He's sort of irresistible in an "I'm-desperate-for-love-I'm-a-monster-after-all" kind of way...


And his friends seem to pop up out of nowhere. That's what monsters do I guess. Though, they are extremely polite. Surprisingly!


No... But thank you very much for asking.

Have fun dreaming up all kinds of monster baby finger-puppet play with your kids!

Have a fabulous weekend. And to my fellow Canadians: "Happy Thanksgiving!" I'll see you Monday!

Wednesday, August 24, 2011

Futuristic Construction with The Boy


I'll get directly to it today. Visitors are on their way and my abode needs an overhaul NOW-ish. I'm going for the "illusion" of clean. Wish me luck. Here's what the boy and I got up to yesterday!

Tutorial: Kids' Futuristic Construction Set

You will need:
  • Cereal box
  • Foam meat tray
  • Egg carton
  • Paper bag (or whatever paper you have on hand)
  • Wooden skewers
  • Pair of scissors
  • Wax crayons
  • Pencil
  • Sharpie
  • Hole punch
  • Assortment of round things to use as templates
  • PVA glue

Take your cereal box, open it up and draw out a goodly amount of circles and rings using round things (bowls, cups) as templates. Trace them all with your Sharpie. Colour them in with the wax crayons. There are no rules here. Let your child go colouring-mad!


Cut out all the circles. Use a hole punch to punch out several holes in each piece.


With a paper bag (or whatever paper you happen to have around) and PVA glue, make paper beads by rolling your paper up into long tubes and cutting the resulting tubes into sections like so.


Cut the cups out of an egg carton.


Using a foam tray as your base, poke the wooden skewers down into it, pointy end down.

Your little architect now has all the elements necessary to construct his buildings of tomorrow!


Go ahead my little one, build to your heart's content.


Look at him. He's happy. He's busy. This is the life.


We had fun with our simple construction set. I said we, yes. I'm not ashamed to admit that I played with it too. That's right. You're jealous, aren't you? Well... go on then. Make yourself a whole glorious set, and go to town creating some nifty, state-of-the-art edifices!

Alrighty, must clean now. You have a lovely day, and I'll see you again on Friday!

Monday, August 15, 2011

The Rhythm In The Rhymes


This is a guest-post originally published as part of The Crafty Crow's "A Book & A Craft" Event in June. Just in case you missed that post, here it is again!


The boy received A.A. Milne's book of poetry "When We Were Very Young" as a gift from his Grandma a few years ago. This book, originally published in 1924, is filled with delightful poems, some of which are nostalgic, some of which are thoughtful, but most of which are silly and funny. These are the ones the boy and I love best. We read them together before bed, often clapping our hands as we do because we just can't help ourselves. He's got rhythm, the boy does. And Mr. Milne's poems are very rhythmic indeed.

This got me thinking about a craft that would go along with our beloved book. Whatever could I make? Well, a shaker springs to mind. And the recyclables are waiting, ready to be transformed... Are you ready? Let's shake a leg then!

Tutorial: Plastic Jug 'n Bread Tag Shaker

What you will need:
  • Plastic jug
  • 2 wooden skewers
  • 2 wine corks
  • several bread tags
  • a colourful scrap of junkmail
  • pair of scissors
  • marker
  • ruler
  • hole punch
  • carpenter's glue
  • Mod Podge
  • paint brush
  • drill with small bit
  • small hand saw
1. Start with a clean plastic jug. Using a ruler and marker, draw a straight line somewhere near the middle of the jug.


2. At the line, cut off the bottom of the jug. Trim the cut edge of the top.


3. Using your hole punch, punch 2 holes in each side of your jug top.


4. Prepare your corks.


5. Cut each cork in half using the small hand saw. Sand down the cut edges to make them smooth.


6. Drill a hole in the cut side of each cork piece. Go as deep as you can without piercing the other end.


7. Cut 4 small circles out of colourful junk mail. Use Mod Podge to glue a circle to the top of each cork piece.


8. Cut your skewers so that they are 1 inch (25 mm) wider than the width of the opening in the plastic jug. Divide your bread tags into two equal batches. Place each batch on a skewer.


9. Place a skewer through the holes on either side of the jug as shown below.


10. Put some carpenter's glue into the cork holes.


11. Place a piece of cork onto each end of the skewer.


12. Repeat steps 9 through 11 for the other skewer.


13. Let the carpenter's glue dry for a good long time.

And you have shakability!


Enjoy your utterly recycled plastic jug 'n bread tag shaker (with a built-in handle no less). And stand back as your child lets loose banging out the rhythm in the rhymes!


If you've never visited The Crafty Crow and you have children, drop everything and go there now. Cassi, the brains behind that operation, gathers an endless array of kid-crafty goodness from across the craftosphere that will keep your children busy till they fly the coop. Really. I'm not even joking. It is NOT to be missed. Thank you Cassi for creating such an indispensable resource!

You have a lovely day now won't you? I'll be back Wednesday, right here!

LinkWithin

Related Posts Plugin for WordPress, Blogger...