
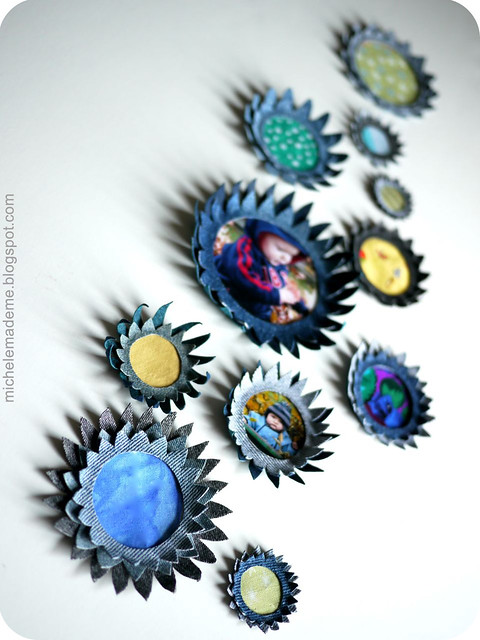
If you haven't had the chance yet to make anything out of your old jeans, here is a very simple and pretty photo display that can be done with just a few scraps. Don't sew? No prob, Bob. Nary a stitch is needed. Step into my office...
Tutorial: Fall Floral Fridge Photo Display
You will need:
- Scraps of jeans and other fabrics
- cardboard for protecting your work surface
- Pair of scissors
- Circle templates in many sizes (made of cereal box cardboard)
- Pencil
- Fabric stiffener (I used Stiffy by Plaid) and tray (to pour it into)
- White glue (PVA)
- Rubber cement
- Small magnets
- Some favourite photos
1. Protect your work surface with a hunk of cardboard or a platter. Take out your fabric stiffener, a paintbrush, a tray or plate, and some delicious denim scraps. (I only show one scrap here but you'll need a few in a couple different shades.)

2. Pour some fabric stiffener onto your tray. Liberally "paint" your scraps of denim with the stiffener. Cover each piece evenly. In this case, more is more. You want your scraps to be saturated with the stiffener. Allow the pieces to dry. If you're like me (a wee bit impatient), throw the saturated scraps on a platter and put them in the microwave for 30 second increments until dry.

To make ONE fridge flower magnet:
3. Using your circle templates, draw out 2 progressively larger circles from different shades of stiffened denim. Cut them out.
4. Draw out petals on each of the 2 circles. Cut them out. Draw out a circle in the middle of the smaller denim circle. Cut it out. You should now have 2 parts: one ring with petals (frame) and one flower with petals (bottom) as shown in #4.
5. Curl up the petals of each part by bending each petal up between your fingers. This will give your flower dimension.
6. Cut out a photo to fit within the top ring (frame) but also within the bottom flower.

7. Attach a magnet to the back of your bottom flower. I used a little dab of rubber cement to make sure the bond lasts. Allow to dry.
8. Glue the photo into your bottom flower using white (PVA) glue.
9. Glue the flower frame on top of your photo.

Make a slew, a whack, a whole spray of these, some with photos, some with colourful fabrics scraps for a fall floral fridge photo display!

You can even make up a few monograms to add to the mix...

Place those flowers on your fridge, step back and enjoy your display!



Teaser alert! I'll soon be releasing a new design to my little shop that takes today's tutorial one-step further. Stay tuned...
Today I'm Diggin' This Denim: (THIS IS UNBELIEVABLE by the way) Denim Work by Julie Floersch
You have a lovely weekend now. Gwen from Gwenny Penny will be at the helm on Monday. Can't wait to see what sort of drop-dead denim she's come up with!


