

I LUV covered buttons! Have you noticed a spike in their popularity recently? I have. I'm paying attention over here ya know. So I devised this handy tutorial that avoids the trip to the button store altogether and allows you to make these little babies with stuff from around the house.
Let's do it!
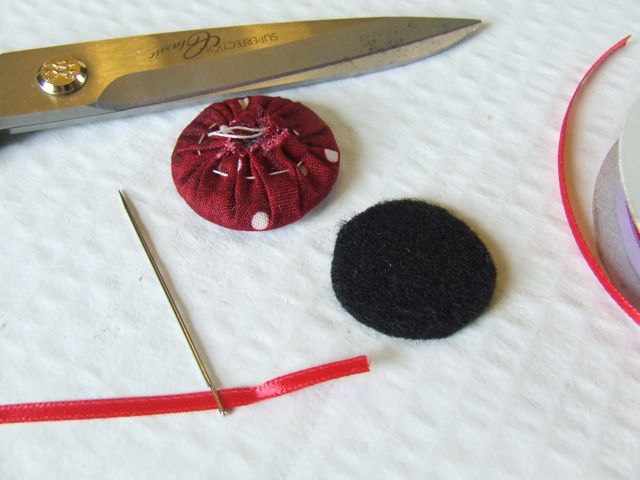
You will need the following:
- fabric scrap
- needle and thread
- polyester batting (not shown)
- flat plastic (I keep the plastic packaging that comes my way for craft purposes)
- felt scrap
- narrow ribbon
- circle template or round thing
- pencil or marker
- scissors
- craft glue

To begin, draw out 2 circles on your plastic. Cut them out. If your plastic is too thick it'll be difficult to cut out. I use thin, cuttable plastic and layer a few pieces to make it sturdy.


Draw a circle from your chosen fabric that is about twice as wide as your little plastic circles.

Cut it out! No really, cut the fabric circle out. With a needle and thread, sew a running stitch all around the edge of the circle.

Pull up the ends of the thread just enough to make a little fabric cup.

In your little cup, layer a few pieces of batting. On top of that, place your glued plastic circles.

Now pull up the thread ends tightly so that the fabric comes around and over the batting and plastic circles. Tie the ends tightly.

If you flip the thing around, it should now look like a button! But, patience, we're not done quite yet...


Cut out a little felt circle, slightly smaller than your button. Take a large needle and a short piece of narrow ribbon. Thread your needle with the ribbon.
Create a button shank by sewing your ribbon through the centre of the felt circle as shown in the next photo.


Next, sew your ribbon down onto the felt so that it stays in place.

Then put a whole whack of glue on this side of the felt. This will hold the felt to the button and will help keep the ribbon shank intact as well.


Using some nice matching thread or embroidery thread, blanket stitch the edge of the felt to the button.


I made a whole bunch of them...


Let the button-making begin!
I'm joining a few link parties today: