Showing posts with label renovations. Show all posts

Monday, September 16, 2013

Shelfish

Tell me if this storage concept makes sense to you. Store your stuff on one layer. That way you'll be able to see every bit of it. And if you can see your stuff, then you might actually use it! I don't know about you but it resonates with me so I'll be trying it in practice whenever possible.

I recently made two pink shallow wooden shelves keeping this concept in mind. Oh, how pleasing to see my supplies arranged so prettily and so closely to hand. 

I made a third wooden storage thingy too. This one is more of a drawer. It sits atop a rolley crate that makes its home under my work table. My Lo made the crate several years ago. I made the drawer to exactly fit his crate and to hold my array of pencils, scissors and paint brushes. When I need something, I just pull out the rolley crate and BEHOLD... there they all are! 

Each of these three pieces is essentially a wooden ladder backed with a piece of plywood. Totally make-able if you can get your hands of some wood, a saw, a hammer and nails. I used the simplest of joinery, the butt joint, connected with gobs of glue and nails, to make mine. 

And speaking of butt joints, I better get off mine and get back to work, eh? Today there's sewing on the agenda. More on that later this week...

♥M

Thursday, September 12, 2013

The Workroom is DONE.


It's just blogging. No big deal. Jump in and just DO IT already. Okay? 

Okay.

Deep breath... 

And go!


******************

Guess what?

I finished my workroom. And here it IS...


Today I'm sharing the overall space. In future posts I'll get into the nitty gritty details (the fun part, in my opinion).

It was a little tricky cramming the whole kit 'n caboodle in one photo. The picture quality kinda blows as a result. But I wanted to give you a sense of the whole space in one fell swoop, you know? So you could imagine yourself in here with me. The quality is what it is. What's a girl to do, eh?

First off I just want to say that Lo and I, over the past few years, have spent many many weeks, and days, and hours gutting the entire basement, reconfiguring the space, putting up new walls and drywall, installing flooring, windows, electrical, heating. Not to mention tons of painting and trimming. It's taken us... well... YEARS. But things are finally, FINALLY, getting there.

Let's have a tour of sorts. Starting with paint colours.

Well, I decided to go with a pop of colour in the floor. I wanted and needed something bright and cheery down here. So I went with Para's SuperGrip Epoxy-Fortified Enamel For Floors (mouthful) in a hue known as "Pop Rocks". It has a slight sheen so it's lovely to wash. I'm told it's durable. It sounds durable. But who knows... Time will no doubt tell.

I left the walls in a shade known as "Washed Ashore" (by CIL) that I'd applied a few years ago. It still pleases me, so all I did was spot paint here and there to fix the few unsightly marks that life had left behind. It's a pale aqua-tinted grey in a flat sheen. Still pretty (and quick too)!

The black Ikea bookcase, which we've had for about eight years, sits in a nook that I painted black to match the bookcase. I did this to give the illusion that the case is built-in. It looks fabulous. It was a natural spot for this wicker reading chair too, and combined with the overhead lighting that Lowell installed a few years back, this is the coziest little spot in the workroom.


All trim is painted in plain white semi-gloss, FYI.

Below is a better view of my worktable. Except for a couple things, most everything you see here was in the old space. Actually, Lo came home with this perfect new-to-me yellow lamp just yesterday. It's a vintage find. He picked it out by himself and everything. Could he be more sweet? Don't think so.


Lo gave me permish to use any old wood from his stash. So I went berserk and built, with my own two little hands, the two pink storage shelves you see on the walls. I'll discuss them again in a later post, but for now here below, is a closeup of one of them. You've seen the other one back here too, btw.


I'm proud of my little shelves. Having all my paints and buttons and things so visibly at hand is so... HANDY. It makes doing things much easier and more pleasant. And oddly, just being able to see my stuff makes me want to use it. It's very interesting, from a psychological perspective I mean.

And finally here's the last little bit. Some of this stuff could stand to be better arranged and organized, but hey, as of right now I know where everything is, and it's all clean and tidy. Three cheers for me!


Wow. I blogged. I actually blogged!

Crazy stuff eh?

♥M

Tuesday, September 3, 2013

Moving Right Along

Happy September!

How the blazes are ya? Did you have a fine August? Hope so.

Me? I'm well.

Not too sure what to write about today though... Funny, eh? I've been away for a whole month so you'd think I'd have a million things to report on. But hmm, I'm a little stumped...

Oh, I know!

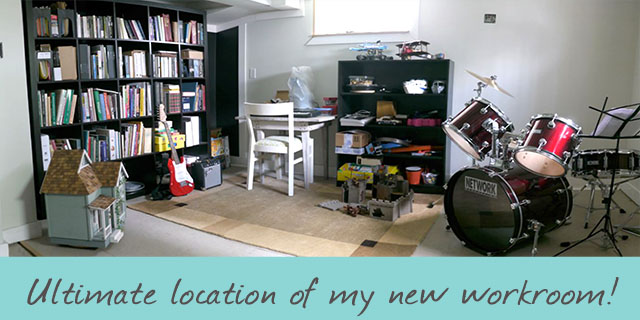
I'll catch you up on the basement work room move okay? Remember this ?

That's right. I had this big plan to switch areas with The Boy. It took me a while to build up the courage and momentum to actually DO it but I did manage. Eventually... Hey, I'm slow.

So anyway, Lo and I have been busy as beavers turning this area into a place suitable for working and creating. We've cleaned and purged. We've painted, we've trimmed. We've moved furniture, we've organized all my stuff. There are still a few things left to do (not the least of which is working on The Boy's area). But things are looking pretty snazzy, and moving along at a nice pace now.

Here's a peak at one little corner...

I promise to show more in a bit, but that's all you're getting for now...

Have a great day!

♥M

Friday, July 19, 2013

Retro-Groovy Sewing Machine Cover Revamp


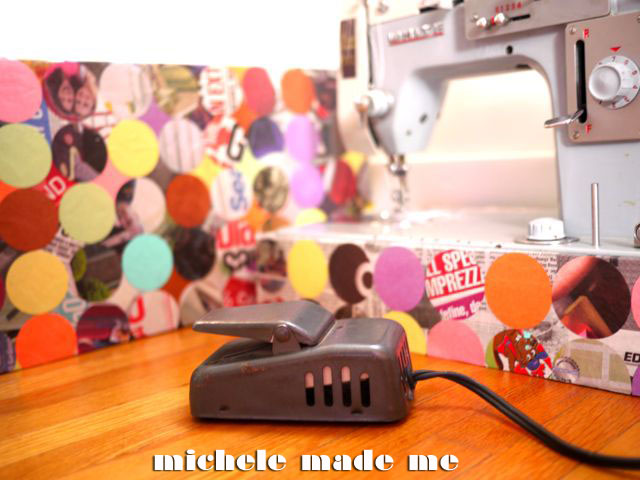
I revampled my old sewing machine's (you know her as Betty) cover and base. Ya, I know the term is technically "revamped" but I typed "revampled" by accident and decided to go with it. Sometimes you just have to love your mistakes.

So ya, get a load of this. Miss Betty has got herself a snazzy new outfit. You can't miss 'er now, can ya? Hee heeeeee.


She's a little bit retro and a lot groovy in her flashy new cover, eh?

I got this look by mod-podging junkmail and construction paper circles over the entire cover and base. I didn't actually choose the construction paper colours. I just used The Boy's rejects: orange, pink, purple, yellow and brown. He's a touch picky about his construction paper hues. Anything remotely pink or purple or yellow he rolls his eyes and will not touch. Way, way too girly. And I think he rejects the brown and orange because they do not excite him... He knows what he likes, I guess.

And I borrowed my little sister's 2-inch circle punch. It came in darn handy to punch out the quantity of paper circles I needed.

The cover was originally clad in grey paper. I removed that about 5 years ago. Here's what the cover had been looking like these last few years.  I yawn.

Quite a change, eh?


I could have made an effort to have the top and base seam match. But I didn't even think of it, truthfully. So I may have to fix that 'cause it's bugging me now. But I like the basic concept and colours. It's fun to have something this colourful and lively in the house!


Now I feel like circle-podging the living room too. Don't think Lo will go for it... I do have a lot of paper circles left though. So, fair warning: don't be surprised if you see them here sometime!

♥M

Tuesday, June 4, 2013

Michele Whines About Her Workroom 2013

Welcome to this year's installment of "Michele Whines About Her Workroom". It seems that once a year, pretty much like clockwork, I do a post where I complain about the shortcomings of my workroom: it's in the basement, it's too cold, it's too dark, it's too messy, blah-dy blah-dy blah...


This year is no different. Except that last year I thought I'd pretty much licked the problem. Alas... no. The dream of creating a bright space down there, just for working, died within a couple months. After that, it was back to the same old patterns. The mess takes over. Plant-like Michele, seeks out light every day. Awkward mounds of craft supplies and half-finished work materialize along the perimeter of the dining room, living room, kitchen, in fact the whole of our tiny little house. The feeling that work follows me where ever I go in my home, and no matter the time nor the place, it tugs at me, calls to me, guilts me for never quite paying close enough attention attention attention...

So, yes. I need a buffer zone. A natural separation. I need to be able to walk away. I need my workroom to work for me not against me. (Sorry. I know you've heard this all before.)

But what to do?

Well... Brace yourself. I have some news. I HAVE FOUND A SOLUTION. I haven't done anything about it yet, true enough. But I'm undaunted! One has to start somewhere, and I'm starting with a plan!


I've unilaterally decided to take possession of The Boy's seldom-used basement play area. He maybe goes down there once a year to get a toy. He's afraid of the monsters that live in the darkness, and I don't blame him one bit. They are awful and slimy and mean and hairy and ugly and should be avoided at all cost. Fortunately, I myself don't mind the monsters so much. I've gotten used to their ways. Aside from the house centipedes who move a little quickly for my taste, I kind of like them. They give the place character.

So his play area will be moved to my cold, dark, windowless spot in the basement, and my workroom will move over to his bright, warm spot where there are two small windows that allow in plenty of daylight. Yes. That's correct. Actual DAYlight! Essentially, we're swapping spots.

Does this make me an awful mother?... It probably does. Be that as it may, I AM DOING IT.

I'll keep you posted on actual progress.

♥M


Friday, January 25, 2013

Reveal: The Boy's Bedroom


It's taken us a few weeks... But today I'm proud - and relieved - to proclaim The Boy's bedroom renovation project complete! Joy of joys!

If I go back and peruse our original wish list, I think we managed to stick to the plan pretty much. We kept the whole thing relatively inexpensive. We used a lot of stuff we already had kickin' around. And we kept it reasonably simple. All in all, a success I think.

Want a look-see? Okay, let's head on in!


When I say we kept it inexpensive, we did. We kept the bed, the dresser, the rug, the shelves, the overhead light fixture, the pouf, the old red cushion, the tall cabinet. We also used other stuff we already had: the aquarium stand, the study chair, the quilt, the other cushion, and all the storage containers.

That's not to say we didn't splurge on a few things. We did. Like all the paint and the supplies for the roman blind, for example. And I also bought a simple white duvet cover. I know. I could have made one easy. But I decided instead to give myself a break and buy one. Sometimes, it's nice to treat yourself, you know? And I supported a local linen shop in the process, so it's all good. We also bought two light fixtures for focussed lighting: one for the head of the bed - The Boy reads every night - and one for his new "study".


Also, several months ago Lo surprised The Boy with a poster he ordered online. It's a large, divided Tintin and Snowy poster and it's quite quite lovely. When it arrived, we ooo-eh and aww-ed, and then we put it back in the box and never put it up. Aren't we awful? Finally, the thing has come out of hiding, and it's found a place on the wall. Feelin' a little better about that now, eep.

As I take a look around, I'm a little aghast at all the stuff we've made in this room. Besides the desk, the shelf brackets, the refurbished fish stand, the blind, the cushions, and the brown dresser made by Lo's great-grandpa, many other projects in this room are also handmade.

Lo, The Boy and I made the black and orange airplanes that hover above the dresser. Hanging on the walls are a few of the pretty paper airplane garlands I made for The Boy a couple years back. Sitting on the dresser is the wooden tower crane The Boy and I constructed together last summer.


You may well know that the bed quilt is my very own "City Streets". Also, the denim pouf is a popular tutorial here on Michele Made Me from back in 2011. Two summers ago, The Boy and I put together the small woven sun wall-hanging. The denim chair cushion in the closet-study is my very first Shop project (which, by the way, is still available as a PDF downloadable template/tutorial right here)!

It's interesting really... To think of all that time spent making all those things... What an investment of energy! But over time, you really don't notice it. You just enjoy the moment, you know? Still, I sometimes ask myself why I make stuff. I look around at our Boy's simple bedroom - now complete - and I see all these projects at work. And actually, I'm proud. One answer to that why-I-make-stuff question becomes obvious. I make things to bring a little of myself to this earthly place. To leave my mark here. And to make it home.


That's a good enough reason, I think. 

♥M

All posts on The Boy's Bedroom overhaul: here (before room), here, here, here, and here.

Monday, January 21, 2013

The Boy's Bedroom Reno: Hardscape


Now that the painting is all put to bed, we've moved on to what I'm calling "the hardscape" of the Boy's room. In this category, I include things like shelves, bed frame, dresser, etc... anything that is physically hard. Like, if you hit your head on it, it hurts. I know this from personal painful experience.

So first off, I decided to put The Boy's aquarium on a different base.

A few years ago, my middle child Dia, brought the above nightstand home. It was being chucked by some neighbours and she decided to rescue it. At the time, there was a very heavy monster-drawer in the bottom space that made you break into a sweat every time you tried to open it. So I hoyked the darn thing out of there. The blue paint is original to the piece but I distressed it a little more and painted the inside bright white. This little nightstand had lived in the basement collecting dust since that fateful day. I noticed it down there a few days ago and thought it might serve well as a home for The Boy's happy fish.

Next, Lo cut and installed new wooden brackets for the shelves. If you recall, the old brackets were those cheap metal ones that attach to a set of metal rails. So glad to see them gone. They were ancient. The shelves themselves are the same shelves - try saying that 3 times fast! - but freshened with a coat of paint.

Lo - my personal hero - also built a custom desk for the closet space. Didn't he do a fine job? I gave it a few coats of maple stain and varathane. I just love how simple it is. In fact, I'm so happy with everything Lo's done in the room. It's super super duper!


The wooden bed, old brown dresser that Lo's great-grandpa made (seen here), and tall white cabinet behind the door will all remain as-is for now. I'm trying to keep this bedroom overhaul simple, you see. I may decide to paint the dresser eventually, but that's a job best done outside when the weather is somewhere above freezing, even if only slightly.

Still have to deal with cushions and bedding and such... Uh huh... That's the next post, okay?

♥M

Previous posts on The Boy's bedroom overhaul: here, here and here.

Friday, January 18, 2013

The Boy's Bedroom Reno: Roman Blind


Lookee, I made a roman blind for The Boy's bedroom all by myself! Well... that's not entirely true. The boys helped a little. But the bulk of the help came from this talented lady (Alissa) and this talented lady (Jen). Ya, I couldn't have done it without these two and their beautifully detailed roman blind/shade tutorials HERE and HERE. Huge huge huge thanks to both of them!


The most exciting thing about The Boy's new roman blind is the action on it. What I mean to say is that it runs SO smoothely. That just makes me happy, you know? I pull the cord and the blind actually folds up so nicely! When things I make work this well, I feel like anything's possible. I love that feeling.


The Boy chose this fabric because he said it had a certain turkish flair. I have no idea what that means really... but I have to admit, Lo and I were both quite skeptical about it. Well not no more! Now we love it, and I'm so glad we let The Boy choose it.


He did good, didn't he?

♥M

Previous posts on this bedroom overhaul: here and here.


Wednesday, January 16, 2013

The Boy's Bedroom Reno: Paint Colours


Here we have the paint colours for The Boy's bedroom. The colour pendulum has swung 180〫from warm-slash-dark to cool-slash-light!

Aside from choosing paint colours, what have we done so far?

Well...

1) Lo gave the ceiling a single coat of white.
2) I sanded, primed, and painted the trim twice in your basic white. That was a job I did NOT find the joy in, I tell you. I looked for it too. But dang it, it was nowhere! Thankfully, I'm on the other side of it now so we're all good.
3) After much research, Lo installed an outlet in the closet. He had to cut through the drywall to do it but managed with minimal damage. I applied several coats of drywall mud to the area in question and sanded the Dickens out of it. You can't even tell anything was done there. Thing of beauty!
4) Patched all holes in walls with drywall mud. Sanded, dusted and washed the walls.
5) The Boy and I decided to tape off some areas of the window wall for a touch of fun. The idea being that the original red colour would show through in stripes when the tape was removed. Here's a peek at the effect...


6) Given the darkness of the previous colour, we had no choice but to prime the walls before painting. I cut in the primer and Lo rolled it on.
7) I was relieved to finally cut in the actual fancy-named paint, "Beige Chanterelle" of which we applied two coats. Lo rolled it on. Unsure of it at first, I am liking it more now but still getting used to it. Thank Pete, it's about 4 million times better than red and orange.
8) I painted the closet in "Vienna Lake", a colour The Boy chose. Here's a glimpse of all the colours playing together...


I'm excited about it! We're chugging along nicely, aren't we?

♥M

Find "before" photos here.

Monday, January 14, 2013

The Boy's "Before" Bedroom


We've officially made a start on The Boy's bedroom overhaul!

This is a project we've been discussing for about a year now... It's almost ludicrous, I know. But it is my belief that sometimes these things have to percolate in the mind for a time before they can be poured out into the real world... Anyway, the work has finally, finally begun. I know, I have an actual goal. Amazing stuff.

Before sharing any progress, I thought I'd show some "before" pictures and our BIG list of plans. There's a lot to be done in this little room but our hope is to keep the changes simple, work with many of the existing elements, donate a lot of stuff, keep the waste to a minimum, and be done swiftly!

Here's what the room looked like before we started, and our wish list for its improvement:


Can't wait to see the backside of that red and orange colour scheme. Yikes-ey... I'll be back with an update soon. Wish us luck!

♥M

LinkWithin

Related Posts Plugin for WordPress, Blogger...