Showing posts with label back-to-school. Show all posts

Friday, August 20, 2010

Series 2: Part 3 - AND THEN THERE WERE TREE

Welcome to Series 2 - Part 3 of AND THEN THERE WERE TREE!!! This is the FINAL episode in this little trio of denim tree crafts. To see Part 1, go out on this limb, and for Part 2 branch out right here. Tee hee.

Today we are making a tree pencil case. For the body of the pencil case, I made a lined-zippered pouch. There are several very good online tutorials that show how to make such a pouch. A good one is this tutorial @ Skip To My Lou!

As is most often the case, my part in this craft is purely superficial and ornamental. But I am OK with that!

To start, I drew up a little tree sketch and made myself a tree template, roughly 3 inches tall.


Now this craft uses the same basic concept as the last two in the series. However for this one, instead of using the jean seams to make the denim disc building blocks (see tutorial here), I actually cut into the pant legs to make tiny little 1/4 inch strips like this.


And with the gluin' and the rollin', I made little denim beads instead of large discs ... Look! It's like the denim discs made little babies or something! Aren't they cute?
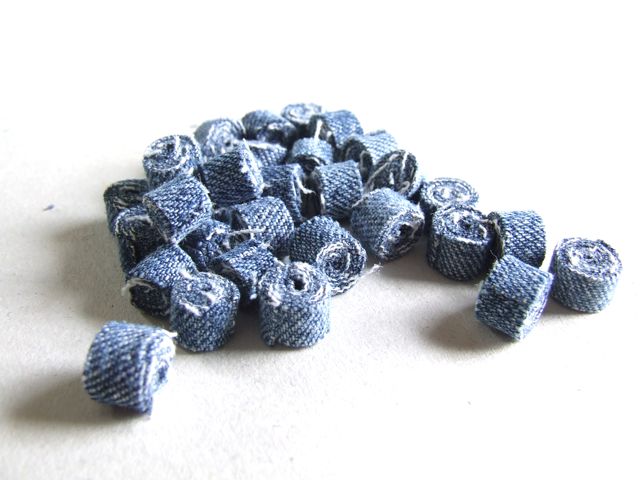
Now these denim beads serve as leaves. I needed a trunk NOW or my tree was, well, a shrub.

I decided to use the remaining 1/4 inch denim strips to make my trunk as well. So I took one of the strips, and put some glue on the last few inches.


I folded it over on itself and placed it on the tree template to see how tall my trunk needed to be.


Added some more glue...


Folded the strip onto itself again...


Molded it to the template...


Added a bead for fun...


Added more glue... You see what's happening here?


In the fullness of time with the gluin' and the addin' and the moldin', I got me-self something that looks like a little trunk with nifty bark.


Now I put those little denim beads on top and lo! IT IS A TREE! A little 3 inch bonsai.


I let this tree and another (I made two) dry overnight with all the glue and everything.

The next day, I cut out the pieces for my pencil cases. I used zippers from the jeans. For the outer shell of the pencil cases, I used denim of course, and a little burlap!

For each pencil case:
  • I attached the tree to one of the outer shell pieces before assembling the pencil case. I sewed on the tree pieces using a needle and thread and a simple running stitch.
  • I then proceeded with the pouch assembly as in the Skip To My Lou tutorial.
  • Afterwards, I coated the trees with a layer of varnish so the denim won't fray.
  • I added a "customized" zipper-pull.
And that, as they say, was that.

Oh and here are the little pencil cases now!


Have a fantastic day!


P.S. I am a linker.

Photobucket Funky Junk's Sat Nite Special
Craft Schooling Sun.Post logo
My Weekly Blog Meme Keeping It Simple Making mmm button

NightOwlCrafting http://www.thethriftyhome.com

Friday, August 6, 2010

Series 2: Part 1 - AND THEN THERE WERE TREE


I'm starting a new series! Yippee! I ranted a teensy tiny itty bit the other day about my 10 part series (The Feast of the Flower which is still going on btw... and, yes I'll finish it...). But I can't help myself. I have a 3-part series that's taking up valuable space in my tiny brain and I have to purge it to make room for thinking.

This series is called "And Then There Were Tree". Because it's about making trees. I like plants, K? AnyWAY, I was inspired by Arlette over at the wondrous crafty blog Polka Dot Pineapple. She makes these really cool recycled denim coasters using the remnants of jeans. And so I ran with the denim disc idea and came up with three simple little crafts of my own.

Series 2: Part 1

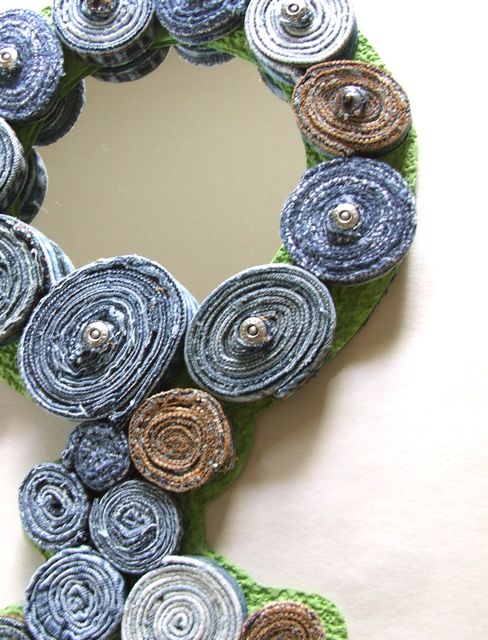
Today I begin with a tree mirror. Place the mirror in your child's room or gift it to them as a back-to-school locker decoration!

You will need:
  • the long jean seams that SEEM useless but aren't (I used the seams from 2 pairs of jeans for all 3 crafts in this series.)
  • those little decorative metal buttony things on jeans
  • a small round mirror (I thrifted mine for pennies.)
  • box board (I used a cereal box.)
  • craft paper (A gift from my artist friend Bubby.)
  • pencil
  • craft glue and a glue gun
  • scissors
  • pins

1. Making Denim Discs:

Take a jean seam.


Apply a dab of craft glue on the end of your seam.


Start coiling the seam around itself.


After some coiling add another dab of glue.


Continue this glueing and coiling process until you have a disc. Pin the end in place. Let dry.


Make a bunch of these discs of all different sizes.


2. Mirror Design:
  • Take your mirror and play with the arrangement of denim discs around the mirror.
  • Once you have your design, draw out the shape onto the box board and the craft paper.
  • Cut out both the box board and the craft paper shapes. Don't forget to cut out the hole for the mirror.
  • Make a hanger by sewing a loop of denim onto the top of your box board shape.
  • Now glue the back of the mirror to the box board shape.

  • Using a glue gun, glue the craft paper shape to the front of the mirror, and THEN using craft glue attach your denim discs to the craft paper.

  • For a final fun touch, glue on those little decorative metal buttony things from your jeans.


And your arboreal mirror is DONE!


Have yourself a great day!


P.S. Today I'm linking!

Favorite%2BThings%2BFridaybig%2Bbutton.jpg Photobucket Funky Junk's Sat Nite Special
Craft Schooling Sun.Post logoKeeping It Simple Making mmm button
NightOwlCrafting  http://www.thethriftyhome.com

LinkWithin

Related Posts Plugin for WordPress, Blogger...