Showing posts with label upcycling. Show all posts

Friday, November 15, 2013

Question: What do you do with a glaringly blank wall...

.... and an irrepressible urge to cover it?


Answer: Take your foam trays collected over the last three and half years and a roll of masking tape. And stick it up there.


Obviously.

♥M

Friday, May 24, 2013

Tutorial: Foam Tray Sign


Yes, indeed. It's a sign made from a foam veggie-slash-meat tray! The kids might even like to join in on this one 'cause it's quick, it's easy, it's messy, and fun as pumpkins.

Tutorial: Foam Tray Sign


Step 1: Gather supplies. For this craft you will need: a clean foam tray, pair of scissors, pencil, ruler, ball-point pen, paper, tracing paper, paint, paintbrushes and a toothbrush.
Step 2: Cut off the raised edges of the meat tray.
Step 3: Use your pen and ruler to draw a rectangle on the remaining foam rectangle. Cut along the lines to create a lovely squared-up rectangle.
Step 4: On a piece of paper, draw yourself a sign design. It can be a reminder, a short inspirational message, a name plate, or any crazy word or expression that takes your fancy! Fill the area around the word with a filler design. Anything from cross-hatching (as I've done), wavy lines, zig zags, loops, a pattern of dots... etcetera... will work!


Step 5: Transfer your finished design onto a sheet of tracing paper. Place the tracing paper over the foam rectangle, and then gently re-trace your design so that it is transferred to the foam tray. Once you've transferred the entire design, remove the tracing paper from the foam rectangle. Re-trace your entire design directly on the foam rectangle with the ball-point pen. Firmly re-trace around the main lettering, and gently re-trace the filler design.
Step 6: Now you're ready to paint! Choose a bright, saturated colour for the bottom layer of paint. Fill your brush and apply the paint while holding your brush almost horizontally. This way you'll avoid filling in all the grooves with paint allowing the tray colour to show through. Allow the first layer of paint to dry completely. Apply a lighter second colour of paint in the same exact way. You don't have to completely cover the bottom layer of paint. Let some of it to show through for a nifty contrasting effect. Let this layer dry as well. Now go over your letters only with a third bright paint colour. And finally, age your sign with a little spatter-painting using a toothbrush and some watered-down black paint. 

Well lookee there, you have signage!


Go ahead now... Be bold and try it yourself!

♥M

Prior and future versions of this craft live here and here.


Thursday, September 15, 2011

Drop-Dead Denim: Flickr Group and Email Goodies


I'm spending the whole of September attempting to make some funky things from the pile of old jeans I see before me. Apparently, so are you.


As promised, here are a few of the denim items some of you have emailed me or uploaded to the Drop-Dead Denim Flickr Group. Let's examine your jean-ious!

Sharon from Crafts 'n Coffee shares this striking combination: a denim-covered memo board and pencil cube for all your desktop organizational needs. Her fine workmanship is evident in both pieces and she provides a tutorial so you can make them for yourself. Now that's organization!

Board&Cube2

In her sweet little handbag, Ariane (my younger sister) from Ariane Quilts shows that combining denim with vibrantly coloured fabric and some simple embroidery really brings that denim to life.

DSCF5472

The following piece is called "Climbing the Walls". It is a denim string quilt by Lynne Miller Deist of Miss Stash Would. This indigo beauty speaks for itself, wouldn't you say? To learn more about it, Lynne tells the story here.

Climbing the walls Small

Finding these cute monsters under your bed would be a denim delight! These are Hele's first attempts at making stuffed toys. Given the state of their eyes, it appears they may have been engaging in fisticuffs under the bed there. Still, don't you just want to hug them? I know I do. You can find Hele blogging over at Helen y Troy.


I'll be doing a second "Flickr Group and Email Goodies" post near the end of the month. Keep that denim coming!


Today I'm Diggin' This Denim: Denim Rug by Roolen

Have a fantastic day and guess what? I will see you again tomorrow!

Monday, May 23, 2011

It's a Dandy Giveaway!


THIS GIVEAWAY IS NOW CLOSED! THANKS FOR ENTERING!


Hi!

IT'S GIVEAWAY DAY!!!

The day wherein crafty blogs far and near join Sew Mama Sew in a craftospheric-wide gift-giving extravaganza extraordinaire. The chances of winning a prize today are ama-ZING. So prepare yourself for the onslaught of eye-candy, give those digits a stretch, slather on some hand lotion, visit some beauteous blogs, and click 'n comment til you can click 'n comment no more. Best of luck to YOU!

Today I aim to give away some loveliness as well. If you're new to Michele Made Me, welcome! So glad you could join in the fun.


This day is thricely special to me. I'm officially celebrating my 1st blogiversary (which actually took place last month but sorta got shoved to the nether regions of the to-do pile). I've recently published my 200th post. Yippee! And I've witnessed this blog's 400, 000th pageview. Hurrah! A lot of round numbers and many 'a milestone for sure.

Perhaps you are wondering what is getting given. Perhaps you wish me to get on with it and cease my incessant blathering. Indeed. Forgive me. Let's do this thing.

First off, contrary to popular belief, I am NOT giving away dandelions. They just somehow got themselves into my pictures. They're everywhere.

This is what I will be giving-away:


1. One me-designed handbag upcycled from an old sweater, and inspired by the book "ReSew" by Jenny Wilding Cardon and published by Martingale & Company.
2. One copy of "ReSew" which I reviewed in my last post here.
3. Five fat quarters from the Art Gallery "Color Splash" collection.
4. One seam ripper by Clover.
5. One package of 16 embroidery needles, size 3/9 by John James.


To enter you must:
  • Be from Earth.
  • Have an email account that isn't broken or dead to you, and can be reached by me.
  • Leave a comment on this post stating your most beloved colour of all time.
The winner will be randomly chosen on Thursday, May 26th, 2011 @ 6 pm EST and announced in Friday's post.

And finally, to you who has visited this little blog over the last 13 months, who has left a kind word, who encourages me and pats me on the back, to you my friend I want to say thank you. It's a joy to share my crafty experiments and musings with you. Thank you for being here. ♥

Now, if I dig deep, I'd have to say my favourite colour of ALL time is aquamarine blue. What's yours?

THIS GIVEAWAY IS NOW CLOSED! THANKS FOR ENTERING!

Friday, November 19, 2010

Have you seen this flamingo?


  • Last seen: on October 18th, 2010, in a box amongst tissue paper on her way to the U.K. She has yet to reach her destination.
  • General Description: She's a flamingo with dark brown eyes. She's approximately a foot tall. She's very light. She is made from an old pink T-shirt. She wears a yellow and pink felt hat that looks like a flower. She is adorned in small felt flowers, and has a yellow ring around her beak. She's very well behaved and never says boo.


  • Distinguishing Features: Both her eyes are on the same side of her head. The tops of her feet are green with little salmon-coloured hearts. The undersides of her wings are orange. She has cork-screw legs. She will answer to exactly no name because she hasn't got one. Sniff.
I never named the flamingo because ultimately she isn't mine. I am only her creator. I made her for the Softie Swap held by The Clip Café earlier this year. She actually belongs to Amy @ The Happy Daisy and I felt it was more appropriate that Amy name her. I now regret that decision. Now there's a little pink floral flamingo bobbing amongst the bitterly cold waves of the North Atlantic with nothing. Not even a name. Sniff again.

If anyone sees this flamingo or has any information regarding its whereabouts please contact me or Amy @ The Happy Daisy anytime, day or night.


Now please have yourself a safe and happy day!

Thursday, September 16, 2010

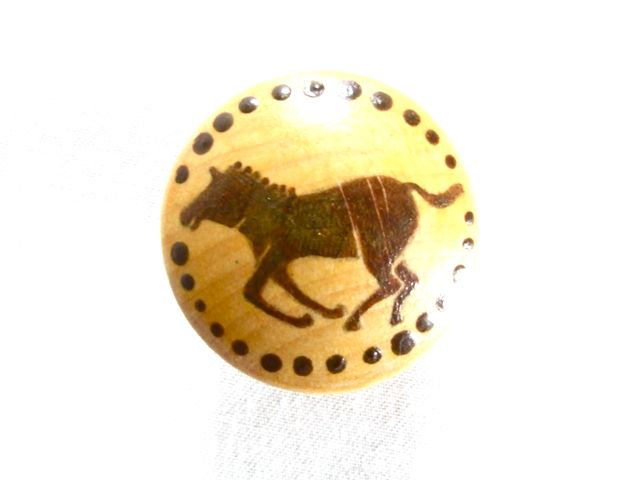
Tutorial: Hand Painted Wooden Knobs


My basement workspace is a mess. Still. I tidy it up. I make some headway in the organization department, and 2 nanoseconds after getting some crazy notion in my tiny brain, the place looks not unlike the epicentre of some horrific crafting disaster. Why do I let this happen? SIGH.

So much needs to be done down here. I need working doors for my closet. I need to organize my yarn. Again. I MUST gain control over the ever-growing pile of recyclables that I simply CANNOT part with! I need knobs on my credenza drawers so that I don't have to stoop down and desperately grip the drawer-bottoms with the very tips of my fingers in order to get to the craft supplies and tools trapped inside! I NEED KNOBS!!!!!!

Okay, Okay... Get a grip, Michele. Don't get your knickers in a twist. Don't I have knobs? Somewhere in this mess. Is there NOT a stash of wooden knobs SOMEwhere down here?! Think Michele, think! There is?!!! Oh yes... There is... Pardon the outburst. Here is that little knob stash!


Okay, well, I'm sorry. These knobs are lovely and all, but they just won't do. They are boring. Ordinary. Sad little knobs. We need something better.

Let's do something about it! Let's paint these babies!

Shall we begin?


Tutorial: Hand Painted Wooden Knobs

Draw circles on a sheet of paper, a little smaller than the top area of your knobs. Make some designs. Whatever you like. I happen to be partial to plants and animals. So here I go.


Once you are satisfied with your designs, gently transfer them in pencil onto some fine tissue paper (you know the kind you stuff in gift bags). Cut them out.


Now give your knobs a few coats of paint. I used liquid acrylic craft paint and put on 2 coats. Some knobs I left as is. Allow the painted knobs to dry.


Once the paint is dry, take a knob and coat the top surface with Mod Podge using a small paint brush.


Take one of your little tissue paper circle designs and, drawing side down, place it on the Mod Podged knob.


Gently smooth the tissue paper onto the knob surface with your brush. You will see the drawing appear very clearly on the knob. The drawing is protected by a fine layer of paper and therefore won't smudge.


Repeat for all your knobs.


Now your knobs are ready for painting! Yippee! Paint away to your heart's delight!

A few things:
  • You will need a couple of fine brushes as this is tiny work.
  • Once you are done painting, you can (optionally) distress your knobs with some fine sandpaper.
  • You will then need to apply a few coats of varnish to protect your itty-bitty works of art.
  • Wait a few days to allow the paint and varnish to cure before installing the knobs.

Here are some of my finished knobs! Yay for knobs! I have knobs! Woo-hoo!!!


Have a terrific day!


P.S. Linking here!

Tuesday, August 17, 2010

Tutorial: A Boy's Dinosaur Painting Smock


Is it really only a couple of little weeks away? School days again? The boy has grown so much over the last few months. He needs all new clothing. He needs a new lunchbox. He needs a fall jacket. He needs indoor shoes. He needs outdoor shoes. So many things for ONE little person!

There is one thing I can check off his list... A painting-arts-and-craftsy-cover-everything smock... I can make one from a thrifted shirt!!! I can do that!

Are you with me?

Yeah, let's do it!

Okay, so take the shirt. It's a ladies small.


Let's put it on the boy to determine the correct sleeve length ending at the wrist. And then place a straight pin there.


Now let's cut the sleeve where we had placed that pin. And cut the other sleeve the same length.


We need to cut off that huge nasty collar immediately! Above where it meets the neckline. Great!

Shirt - Collar = Comfy.


Now let us flip that shirt inside out and place pins along the inner sleeve edge and down the side, all along the seam.


And machine-stitch a NEW seam about 1 inch from the existing seam along where the pins were placed. We are taking the shirt in, to fit the boy. It will still be big but that's the plan!


Now let's cut off the excess! I like this part.


Binding is definitely needed to finish off that collar edge. Let's take some colourful fabric and tear off a 1-1/2 inch strip a little longer than the collar.


And pin the binding to the shirt collar, right sides together, folding and pinning the very ends of the binding up.


We can now machine-stitch the binding to the shirt with a 1/4 inch seam allowance.


Now let's take out all those prickly pins and fold the binding around and over the collar edge and pin it in place nicely and neatly.

Here we could machine-stitch the binding on, but we've obviously decided to hand-stitch it in place. It does look good this way...


Nice work.


Now, this tiny little cotton knit camisole hasn't fit anyone in ages. Let's cut off the bottom 4 inches.


And take that bottom piece and cut it into 2 equal pieces.


Let's pin each cotton-knit piece along the edge of each sleeve right sides together, stretching the cotton-knit around the sleeve as it is pinned. This will make a stretchy fitted cuff.


Should we machine-stitch the cuff onto the shirt with a 1/4 inch seam allowance, again stretching it as it is sewn? Yes, let's do that!


Let's flip the shirt inside out!


And taking each cuff in turn and folding it over...


We can pin the cuff to the inside of the sleeve just past the stitching line...


And machine-stitch the cuff in place 1/4 inch from the other seam so that when the shirt is flipped over, the cuff looks like this! Good. Nice.


Now the fun begins. Embellishing the smock with dinosaurs 'cause the boy cannot get enough of those guys at the moment!

So after some research and sketching and tweaking, we have these little dinosaurs drawn onto plain white paper.


Let's cut them out to make a stencil. Now using a glue stick, we must apply glue only to the very edge of the stencil and place it gluey-side down onto the shirt.


Now using liquid acrylic paint and a small brush, we dab the paint into the stencil. Leaving the stencil in place, we allow the paint to dry. When dry, a second coat is applied and then the stencil is removed. We reuse the same stencil many times, and place the design strategically around the shirt!


Let's make a large dino stencil for the centre back of the shirt.


And apply it in the same way as the other stencil.


We can do the same thing with the boy's initial, placing it on the front of the shirt.


And add some little dots for fun!


And with that, the dinosaur painting smock is done! Yippee!

Let's see what we've got... here's the back.


And the front!


Perhaps a new label would do the trick?


Have an enjoyable day!


P.S. I am a linker.

NightOwlCrafting http://www.thethriftyhome.com
Life as Lori PonyTails and FishScales

LinkWithin

Related Posts Plugin for WordPress, Blogger...